Original wood interior items bring comfort and coziness to the atmosphere. If you cannot surprise anyone with solid wood furniture, carvings on the shelves, then a floor lamp, chandelier or sconce made of plywood, branches or driftwood will definitely attract the attention of guests.
However, wooden products are not cheap, especially original ones. We offer to save money and create a do-it-yourself lighting fixture. In addition, this is a great way to realize bold ideas, while spending very little time. For the manufacture of lamps and sconces, you will need standard carpentry tools.
Usability rating
To understand how good a lamp made of wood is, we will weigh the pros and cons of this unusual piece of decor.
Advantages:
- Ecological purity of wood is an important advantage over polymers and other synthetic materials.
- When heated and in its normal state, the tree emits aromatic substances from resin - ether, which relaxes and heals.
- Any forms are created from wood materials - raw materials can be easily processed by carpentry tools.
- An unusual option for decorating the interior. Wooden chandeliers in homes and offices are rare.
Disadvantages:
- The main disadvantage of natural raw materials is combustibility. Dangerous situations can occur when using incandescent bulbs and poor-quality cartridges, improperly connecting them.
- Parasites and fungi love wood.
- Plant fibers absorb water and moisture, so a product with a change in humidity will acquire a new volume and size.

The disadvantages are reduced when using different impregnations and appropriate preparation of the timber. Therefore, the lamp made of wood can be called a useful accessory that emphasizes the style of the room and gives it charm.
Material preparation
Lamps and sconces are created from any wood materials. Boards, branches, driftwood, plywood are used - the choice is determined by the idea. Nevertheless, whatever the design for the lamp is made of, lumber is important to prepare correctly:
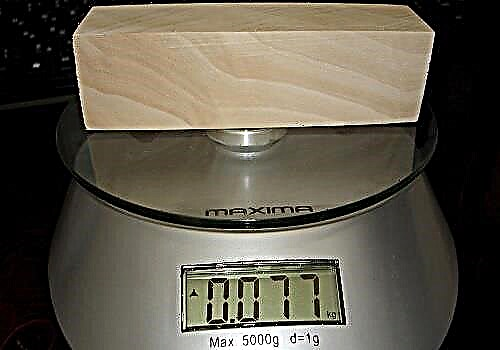
- The wood must be dried.
- Billets should be treated with complex impregnations with refractory and insecticidal, antiseptic components.
- You should choose solid lumber without signs of decay.
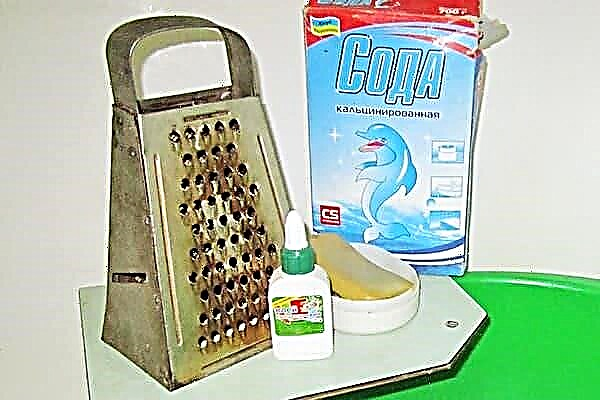
In addition to wood, bulbs for light bulbs, carpentry tools and glue (preferably epoxy) are prepared for the manufacture of lampshades.
Which lamps to use
Since wood is a highly flammable material, you must be careful when choosing a light source. It is better not to use an incandescent lamp for nightlights and lampshades - when burning, it strongly heats both the cartridge and the wood.
For such homemade products, LED lamps and ribbons are suitable - they emit white light and do not heat the surface, they are fireproof. Diode tapes blend perfectly with wood of any color and texture.
Master class: lamps from boards
Ideas for the manufacture of home fixtures can not be counted. We’ll tell you how to make a homemade chandelier - you can take it as a basis for creativity.

For manufacturing, you will need beams of any section, for example 100 × 100 mm or less, depending on the desired dimensions of the finished product, as well as a mirror. We recommend that you draw a drawing of the chandelier in advance, on which the lengths of the sides and the area of the mirror part will be reflected (it should protrude beyond the inner perimeter in order to rest on the beams).
- We make a blank of 4 bars of equal length.
- Next, we form a “castle” - cut a rectangular cup into half the thickness. A cup cutter or jigsaw will help.
- We assemble the structure and glue the parts together.
- After that we carry out painting.
- From the top edge we extend the wiring with the cartridge and fix it to the inside with brackets or small nails.
- We fix the mirror on top. It will play the role of a light reflector. We fix to the corners.
- It remains to attach a suspension, for example, a chain.
The accessory is ready.
The video shows a version of the manufacture of such an object of lighting, the principle of operation is the same:
More ideas of lamps from boards:


Bulbs built into false bulbs. To make them, we connect 3 boards U-shaped, wires and cartridges will hide in the resulting niche.

The wheel will create the effect of antiquity or a hunting lodge, a forest bungalow. We fix the electrics on the upper side of the wheel facing the ceiling.


Another interesting solution from the boards, see the video
Master class: lampshades and plywood lamps
Plywood is a lightweight material that can be easily processed. From it you can create a variety of products. For example, an unusual nightlight-lamp for a children's room or hall. It will look equally good on the terrace of a country house and in a city apartment.

Or like this:

For a night lamp made of plywood in the form of a house, take the universal scheme on which you can make any pattern!

Now we begin to manufacture:
- The templates prepared for all 4 sides are transferred to a plywood sheet of any thickness.
- We send for cutting under an electric jigsaw (or a laser machine for the finest study of petals and small fragments). You can use manual, but with a complex pattern you have to tinker.
- Grind the cut edges with sandpaper.
- Similarly, work is done with the roof. Cut it to size, make a pattern and grind it.
- We glue the blanks together. To keep thin sheets securely with each other, we install bars in the corners of the house on which we glue the walls.
- We start the cartridge and fix it on the desired side of the interior. The wire can be brought into the drawing or make a separate hole for it.
- We fix the roof, make the bottom. We also glue all the details on the corner bars.
- We make suspension or fastening in a convenient way.
The house is ready. A homemade night light or chandelier can be simple with a simple ornament or design with a complex idea, wall or table. Introducing a video workshop on making a house from several sections.
The plywood lamp can be of any kind. The main thing in working with this material is the need to cut holes for the passage of light. More photos of nightlights and lampshades:


To assemble such a lampshade from plywood, you need to cut a groove lock on each workpiece. Then the connection of parts can be done without glue.

A wooden chandelier scatters light throughout the room. The connection of parts is carried out by decorative screws.
Master class: lamps and chandeliers from branches
Branches are the most accessible material for creativity. They can be collected at any time in the park or in the square near the house and immediately start creating. The difference between branches and other wooden blanks - they do not need to be dried. As long as they have moisture, they can be bent and create different shapes. Over time, they will dry out and no longer crack.

Before harvesting the branches, you need to decide on the design of the lampshade or chandelier. Will it be weaving or bandaging thick sticks with a rope, will the tree be combined with other products - forging, metal frames, etc. We present some interesting ideas:


A master class will help to make such an accessory for the interior:


Generalized instructions for creating a ceiling from branches:
- Prepare the branches of the right size. It is necessary to remove the foci of destruction, parasites, treat them with an antiseptic.
- Having decided on the design, we begin the assembly of the form. Weaving does not have a strict algorithm, it is important the easiest way to twist the branches together. Fixing elements is carried out by carpentry glue.
- Enter the cartridge or LED strip, fasten to the wire.
- If necessary, paint the product.
It’s easy to make a lampshade from branches; special skills are not required for this, just like tools.
Master class: log lamp
As a blank for the chandelier, an ordinary log and even driftwood can act. The main thing is that the material is dried and neutralized from insects and microflora.
- We give the workpiece the desired size.
- In the places where the cartridges are inserted, we make holes of the same diameter as the hidden part of the electrical device.
- We attach suspensions.
- We insert an electrician.
You can turn a snag or stick of an unusual shape into a masterpiece by adding a simple lampshade to it:

Chandelier bottles
Combination fixtures look unusual, for example, a wooden base and glass bottles as shades.

Glass scatters light and creates shades of different colors. To make such a ceiling is simple:
- In a wooden board we form openings for bottles. The neck should fit tightly, so we select the diameter as accurately as possible.
- We fix the suspension to the top of the boards. The chains for which the structure can be hung from the ceiling look original.
- We prepare the bottles. So that they give out the light, the bottom must be removed. This can be done by heating the glass with boiling water, then quickly transfer the bottle under a stream of cold water.
- We insert the bottles into the holes in the board, through the neck we stretch the electrician.
The video shows the process of creating an interesting table lamp.