The alignment of the walls cannot be considered complete without filling the corners. However, without knowledge of the technology of the process, it will not be possible to complete this finishing stage of finishing. Below in the text of the article it is described how to properly putty the corners of the walls, as well as what tools and materials will be required for this.
Instruments
To perform putty work, you need to prepare the following tool and equipment:
- two straight spatulas with a width of 100 and 250 mm;
- special angular spatula from two plates located at right angles;
- drill with a blade nozzle for mixing the working solution;
- grinding grater complete with sandpaper P100-P120;
- bubble building level;
- measuring angle;
- plaster rule or flat rail 2000 mm long;
- knife and pencil;
- stepladder or small table.
To fix the surface of the walls and improve adhesion, it will be necessary to perform priming (we wrote about the need for this stage here), which means that a pump room and a paint brush will be required.
Materials
An important point is the correct choice of putty mixture, which is sold in dry or ready-to-use form. Dry formulations are cheaper, but ready-made formulations are more convenient to use, since the manufacturer immediately offers a solution of optimal density.
By the type of binder, all putties are divided into gypsum and cement. Compositions cement based moisture resistant and are used for finishing corners in the bathroom and kitchen. The main disadvantage of such mixtures is the existing probability of the formation of small cracks during drying.
Gypsum plaster putties have a finer grinding, are applied in a thinner layer, but quickly set, which forces the performer to prepare the working solution only in small portions.
According to their purpose, putty mixtures are:
- starting, for primary rough alignment;
- finish, for fine decorative finishes for painting;
- universal, most suitable for filling corners.
The choice of the type of base material should be based on the initial state of the surface of the corners. Starting compounds allow the application of a thicker layer. If the corners are fairly even, then to finish them, it’s enough to buy only the finishing mixture. If you are at a loss with the choice, then buy a universal putty in a ready-to-use form.
For a simple and high-quality putty of wall corners, in addition to mortar, it is recommended to buy perforated corners made of plastic or metal, sickle (polymer plaster mesh 100-150 mm wide) and deep penetration primer. When purchasing a grid, pay attention to its thickness. For plastering the walls, a thicker material is used, for filling the corners - thin.
Preparatory work
At the initial stage, a visual inspection of the surface of the corners is performed and obvious defects are removed with a spatula, a durable knife, and in some cases with a chisel and hammer. After that, the level and the rule checks the vertical of the surface and its plane. In places of significant deviations, pencil marks should be applied.
Next, apply liquid primer to the wall. Wait until it dries and repeat the operation again. This will strengthen the surface, reduce moisture absorption and increase its adhesion - the degree of adhesion of the putty to the wall. On this preparatory work is completed.
Corner Putty Technology
In appearance, external (external), internal and curvilinear angles are distinguished. Each type has its own technology of formation and decoration. Particularly consider the option of how to putty the corner of the wall in places of abutment to the ceiling.
Outdoor
To simplify the process of puttying an external right angle with your own hands, it is convenient to use special corner plates with perforated shelves. They are made of galvanized steel or plastic. Plastic corners are more practical, because not subject to corrosion, traces of which may eventually appear on the surface of the wall in the case of metal.
The order of work is as follows:
- apply a thin layer of putty along the entire height of the corner;
- attach the perforated corner to the surface and press it into the solution;
- using the building level, check the vertical and overall correct fit;
- in case of deviations, align the position of the corner, smearing putty under it;
- wait until the mortar has set and then apply the putty mortar on the wall surface on either side of the corner.
After the putty dries, treat the surface with an abrasive mesh and soak it with soil 2 times. Cement mortars can give a slight shrinkage, which can be compensated by applying a thin layer of the mixture and re-grinding.
Inside corners
Puttying the inner corners is somewhat more complicated. Especially in cases where their size differs from 90 °. When performing work, it should be remembered that the putty layer should not be more than 2-3 mm. Large differences are leveled only by classical plastering.
Putty is applied from the corner towards the wall plane. Very often, the vertical angle is littered to the top or bottom. Therefore, during the finish, the surface must be constantly checked for this parameter. In this case, each of the walls is plastered separately.
It is very difficult to get the perfect angle by applying the mortar and leveling with a spatula. The desired result is achieved by finishing polishing each wall individually. Grouting must be done using plaster abrasive mesh No. 100-120.
Curved angles of arches
Especially for arched sections, manufacturers of building materials produce flexible plaster corners. They have one of the shelves has cuts across the entire width, and provides the ability to bend a straight line. The rest of the technology for puttying curved surfaces is no different from the finish of the outer corners.
The places of abutment of the walls to the ceiling
The angles between the walls and the ceiling are also internal. The peculiarity of their finish is that the putty is made only after the end of the plastering of the walls and the perforated plaster corners are not used. The solution must be applied to the ceiling with a minimum layer.
The leveling process is mainly aimed at obtaining a smooth wall surface, since floor slabs are usually even. If the plates do not match the installation height, then it is best to consider the option of a suspended or suspended ceiling, and in this case, puttying is not required.
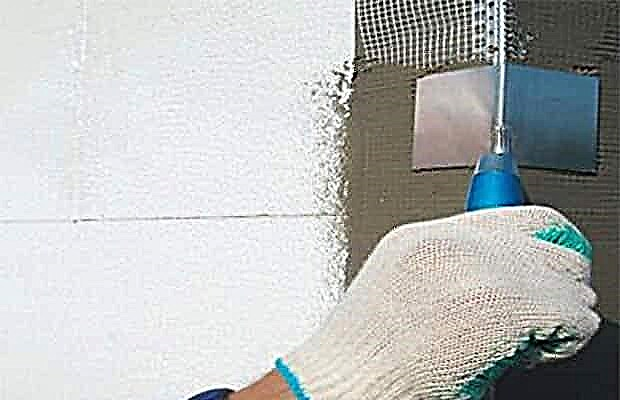
Nuances of plastering corners of drywall
Drywall corners and joints before puttying need to be pasted over with dense paper or a sickle net. It is recommended to cover the self-tapping hats with a layer of PVA glue, which will protect the metal from corrosion and prevent its manifestation on the wall. After this, apply the primer 2 times and putty the corners of the drywall, similarly to the technologies described above.